

Import from CSV
Coming from another tool? Export your tasks as a CSV file and import them into Roni in three steps.
1. Choose a file
Section titled “1. Choose a file”Open Integrations, find CSV file and click Import. Drop your file in the window or browse for it.
Files can be up to 4 MB and 2,000 rows. Both UTF-8 and Excel’s Turkish encoding work — if a file can’t be read, save it as CSV UTF-8 and try again.
2. Match the columns
Section titled “2. Match the columns”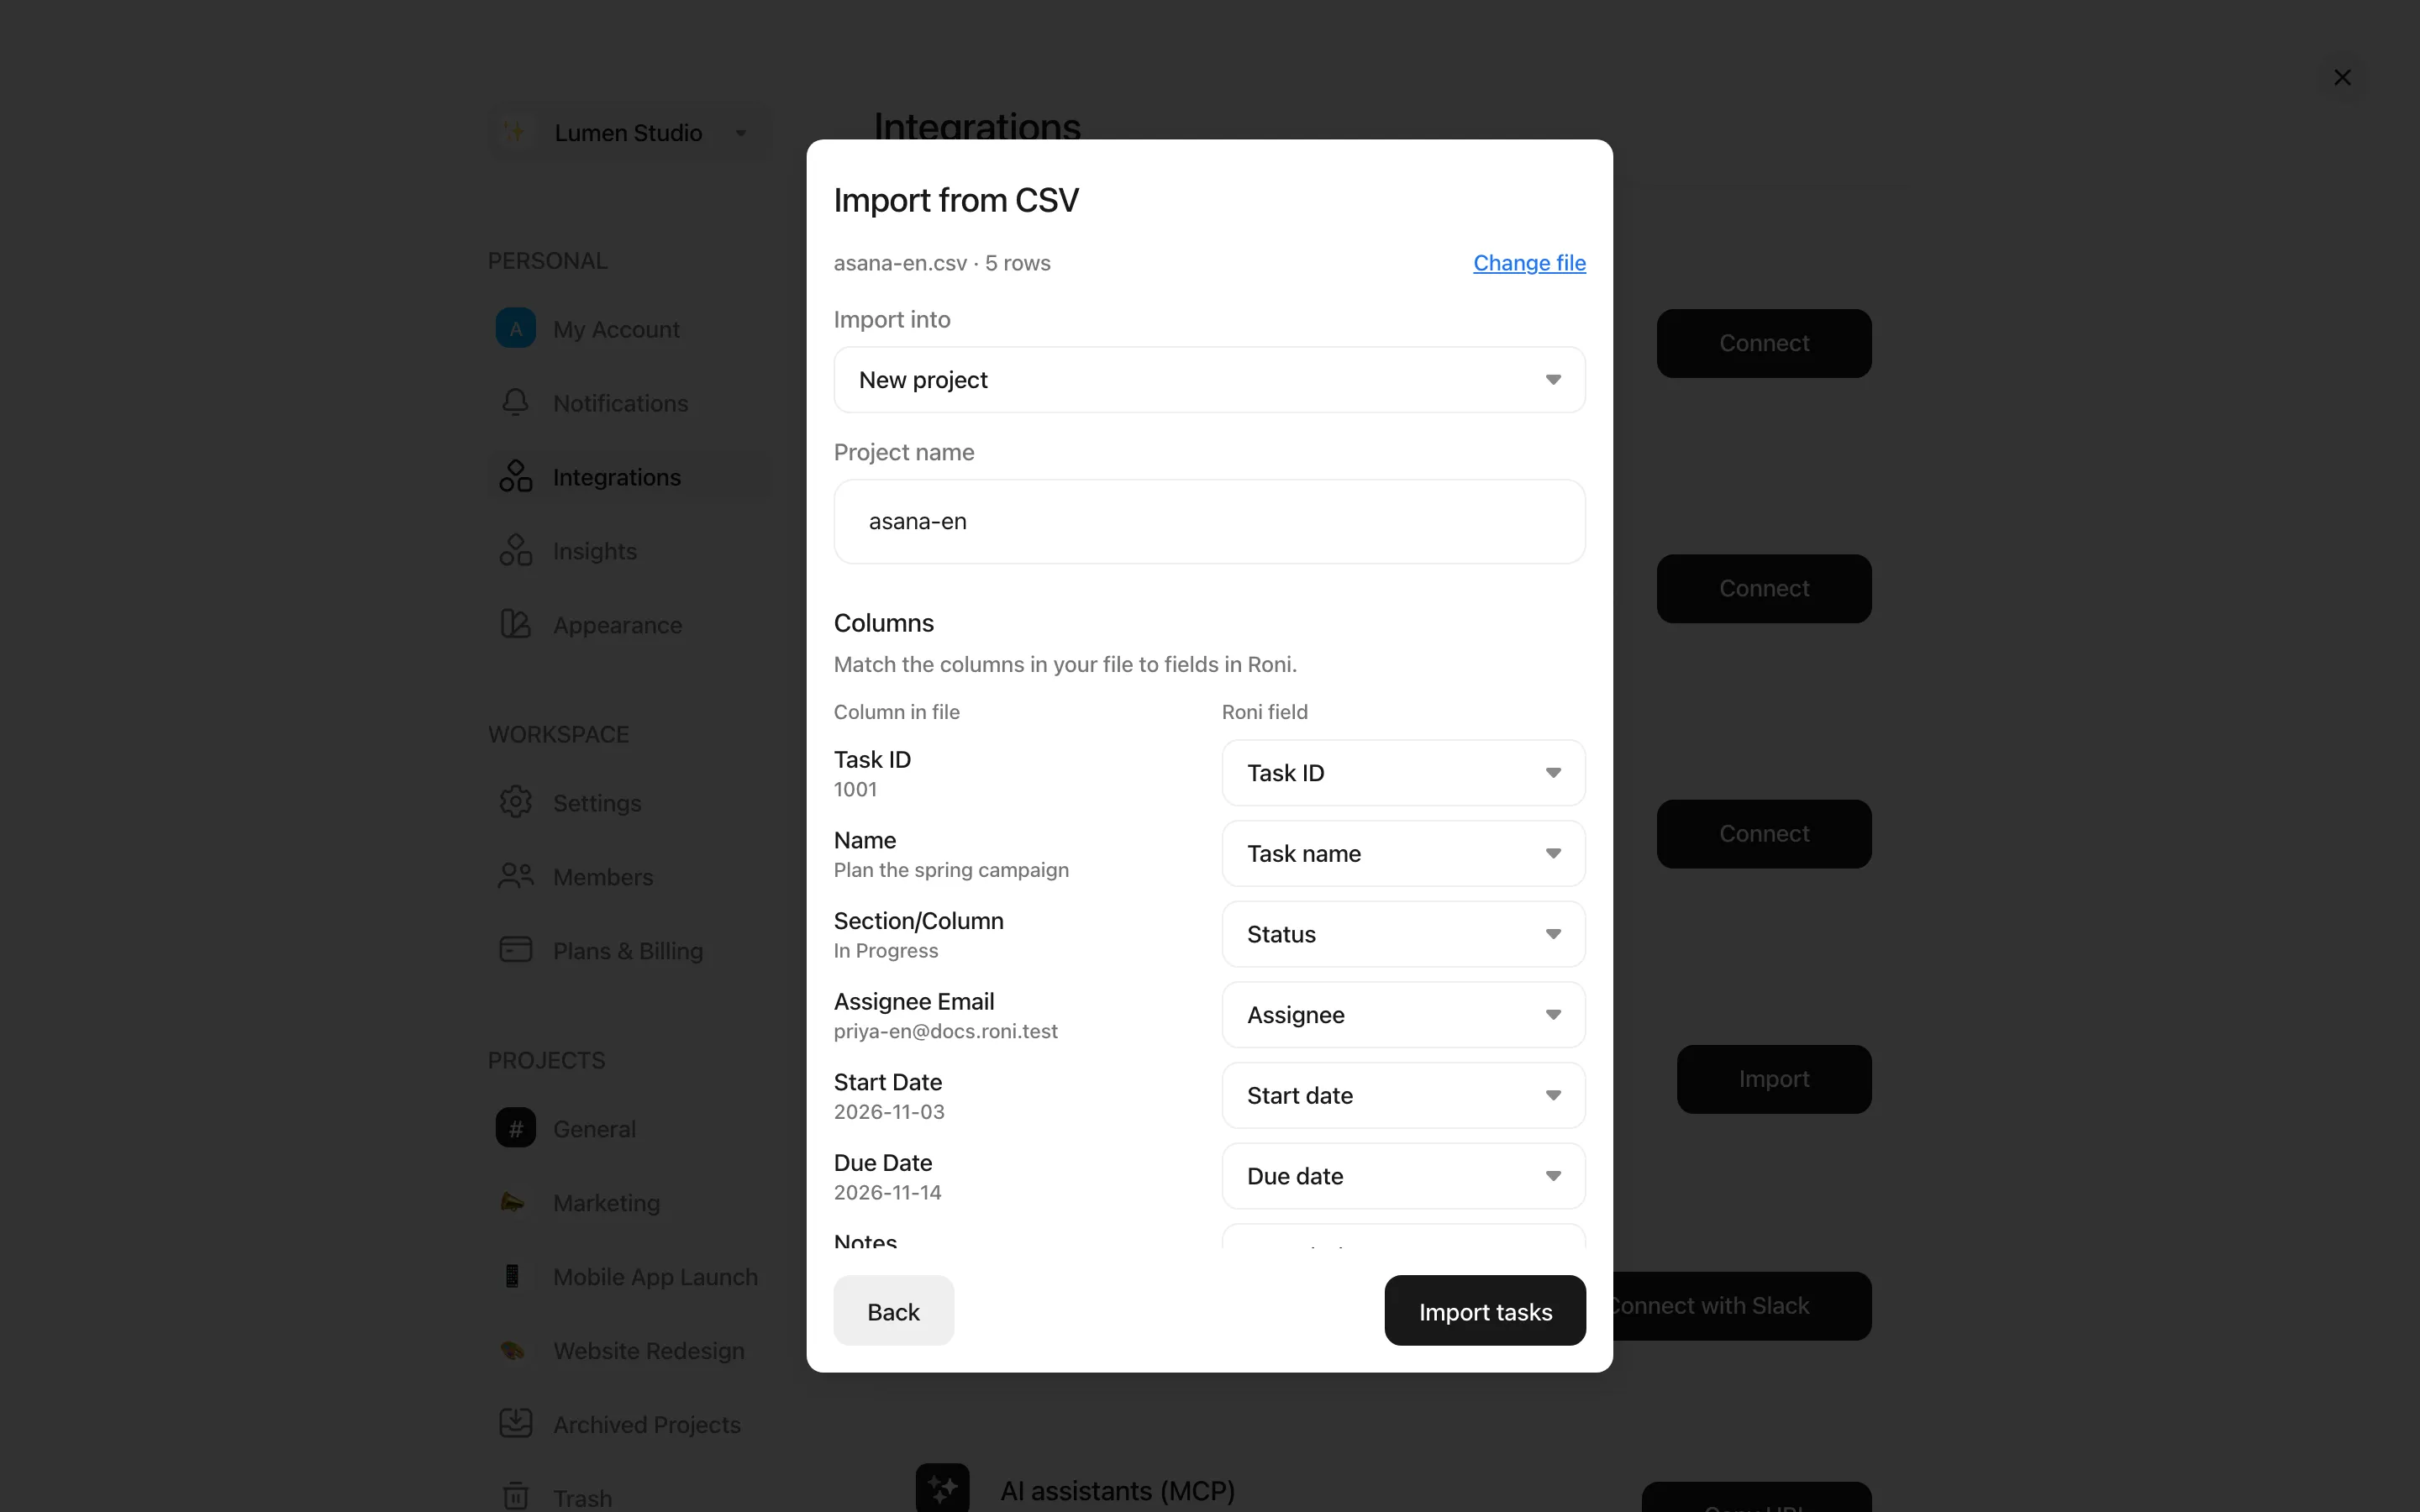
- Import into — an existing project, or a New project with a name you choose.
- Columns — Roni matches columns from Asana, Trello, Jira, ClickUp, Monday, Notion, Linear and Turkish headers automatically. Check each one and change it if needed: task name, description, status, completed, assignee, start and due date, date range, milestone, parent task and task ID. Extra columns (priority, labels…) can be added to the description.
- Statuses — choose the Roni status for each status in your file.
- People — tasks are assigned to the matching members (by name or email). Tasks without a match are assigned to you. For a new project, matched members are added to it.
Rows with a parent task become subtasks of that task. Ambiguous dates such as 03/04/2026 are read using your workspace’s date format unless the column makes the order clear.
Before importing, Roni shows how many tasks and subtasks will be imported and lists any rows it will skip (for example rows without a name).
3. Import
Section titled “3. Import”Click Import tasks. All rows are imported together — an import never stops halfway. The result lists anything that couldn’t be imported; click Open project to see your tasks.
Imported tasks count towards your plan’s task limit. Assignees don’t get a notification for every imported task.